Here's a shot I grabbed of my daughter earlier today. Since you guys made it clear through your responses to my recent survey that you want more photography and post-processing tips, I decided to change things up this time around and include much more granular detail about how the shot was captured and my post-processing workflow for it. So here goes....
First of all, to get the shot, I was lying on my stomach near a patch of purple wildflowers we found down at a local park. I had my 70-200 2.8L lens mounted on my Canon 1Ds Mark II, and I was shooting wide open at 2.8, zoomed all the way in at 200mm. I asked my wife to call my daughter to walk through the flowers, and amazingly everything worked out just as I had envisioned it. I have to admit that it was a real treat to have my wife there assisting me, because when it comes to pics of my daughter I usually find myself in the unenviable position of trying to *create* the moments as well as *capture* them. Today I had the luxury of focusing on the technical stuff, and as a result the frames I got were MUCH better than usual.
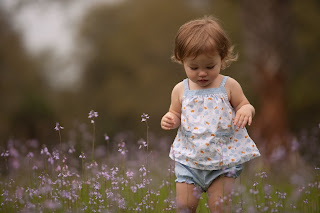
Here's the SOOC (straight out of camera) image, which you can click for a larger view:
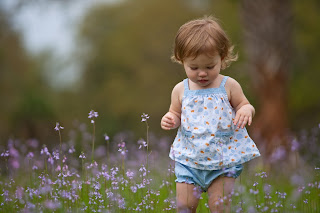
Next up was a bit of tweaking in Lightroom, which included adjusting the White Balance, adding a small amount of Fill Light, increasing the Blacks by 6, Clarity by 21, and Vibrance by 38. I also made some minor tweaks to the Tone Curve. Lastly, I used the Adjustment Brush to increase the exposure on her face just a tad. At this point I was ready to pull the file over into Photoshop. Here's what the image looked like with the Lightroom adjustments (click it for a larger view):
In Photoshop, below are the primary techniques I used to get the final product. There may have been a few very minor tweaks beyond what is listed here, but these are the steps I tend to include in most of my outdoor portraiture. By the way, I'm sure you've noticed that a good majority of pro photographers tend to shy away from revealing the "secret sauce" that makes their photos really pop. However, I really want to help you get to the next level with your post processing, so that's why I'm laying this out for everyone to see. As my photographer/idol
Zack Arias recently told me at Photoshop World, "we all stand on each others' shoulders". So true, so true.
Oh yeah....if you're a Mac user, please substitute "Ctrl" for "Command" and "Alt" for "Option" (but you knew that already, right?) Anyway, here we go:
- To add a bit of contrast, create a Black & White adjustment layer, change the Blend Mode to Soft Light, adjust the color sliders to taste, and reduce layer opacity to around 20%.
- To add even more contrast, perform a "Stamp Visible" (which creates a flattened copy of all of your layers at the top of the stack) by pressing Ctrl+Alt+Shift+E. Apply a Gaussian Blur at 5 px, change the blend mode to Soft Light, and and reduce layer opacity to around 30%. Then mask out your subject (with a reduced opacity brush, if desired).
- To lighten the subject a little, and make him/her "pop" a little more off the background, perform a "Stamp Visible" by pressing Ctrl+Alt+Shift+E, desaturate this layer (Ctrl+Shift+U), change the Blend Mode to Screen, and reduce layer opacity to about 25-30%. Then mask out the background (or alternatively you can start with a black mask and reveal the subject with white).
- Add a bit of midtone contrast-- perform a "Stamp Visible" by pressing Ctrl+Alt+Shift+E, then apply an Unsharp Mask with Amount at 60%, Radius at 20 pixels, and Threshold at 0. Reduce layer opacity to around 30-35%.
- Get your colors nice and saturated by performing a "LAB Mode Color Pop". This basically involves flipping over into LAB Mode, creating a Curves adjustment layer, pulling the ends of the line in, and then flipping back into RGB mode. You end up with a super-saturated layer that you can adjust the opacity of, and/or mask out certain parts. You will almost always have to mask out your subject's skin, because it'll be a nasty orangish/reddish mess. There are actually many different methods for popping colors in LAB Mode....click here for 5 of them.
- Lastly, finish off with some High Pass sharpening-- perform a "Stamp Visible" by pressing Ctrl+Alt+Shift+E, then change the layer's blend mode to Soft Light. Go to Filter->Other->High Pass and set the radius to about 5 or 6 pixels. Then reduce the opacity of this layer to taste.
And that's pretty much all I did to this photo. As you'll see, I also decided to clone out the tree in the background, which I found to be very distracting, but the technique I used for that will have to wait for a different blog post. ;-)
So here's the final before & after image (roll your mouse cursor over the top to see the changes). Please let me know if you have any questions, and if you enjoyed this post, please comment below or on
Facebook. Thanks!

---BLOG-HEADER.png)


 Posts
Posts